So the new Ubuntu is here and you’re just dying to upgrade and have a look at all the new features! With just a few simple steps you’ll be up and running the new system in no time! Before you dive right in there are a few things you should know, and a few ways to (hopefully) make your upgrade process more pleasant.
Upgrade vs Fresh Install
You may wonder if its a better idea to do a fresh install vs upgrade your current installation. There are benefits to doing a fresh installation, but there are also benefits to upgrading your system in place. First, you don’t need to deal with finding and backing up all of your data. Ever done that before and forget something? It’s easy to do. Doing a fresh installation will require that you backup anything you want to keep, because a fresh install will clobber your drive and start fresh. An upgrade on the other hand can be done in place, and you can generally keep working while it churns along in the background. Keep working on the web, or write emails. Do whatever it is that you normally do while your machine upgrades quietly in the background. This is not a problem with the upgrade process.
Another reason that I might suggest doing an in-place upgrade is that it is supposed to be a supported method to move from one release to another, and we should ensure that is the case by using and testing it. The last thing we want to do is provide new and exciting releases every six months, yet require everyone to start fresh each time. This goes particularly for those running Ubuntu that are not tech enthusiasts. Ubuntu should be easy to install, once, and then easy to upgrade as needed after that. I would suggest doing an in-place upgrade and ensure that process continues to mature.
Preparation
Before you get started there are a few things you should know.
First, this upgrade only works from Ubuntu 9.04 to 9.10. If you’re on a previous version (8.10 or earlier) you will not be able to directly upgrade to 9.10. In that situation you’ll either want to do a fresh installation OR do incremental upgrades leading up to 9.10. Incremental upgrades are beyond the scope of this article, but there is plenty of documentation regarding the process here.
Second, I suggest that you apply all available updates to your current system before you move to the new version. You can do this in two ways. One involves the command line and another includes the graphical interface. I’ll outline each below.
Command Line Updates (Pre-Upgrade)
On the command-line (Applications > Accessories > Terminal) you can run the following command to check for and apply any updates pending for your current installation.
sudo aptitude update && sudo aptitude safe-upgrade && sudo aptitude full-upgrade
Apply any updates that are pending from the command above before you move onto the next step, Upgrading. Follow any suggestions to reboot before moving on as well.
Graphical Updates (Pre-Upgrade)
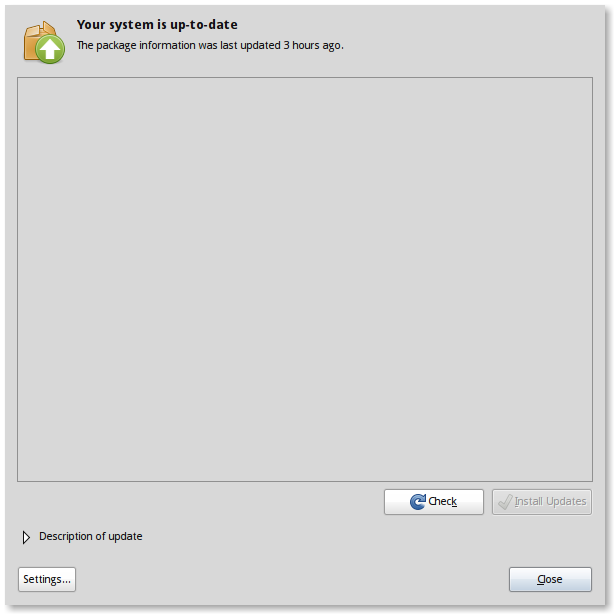
If you prefer the graphical environment you can check for and apply updates by way of the Update Manager tool (System > Administration > Update Manager). This tool will automatically scan for and list any pending updates. Again, be sure to apply these before moving to the next step. This includes applying and rebooting for kernel updates before proceeding.
Selecting a Mirror
The steps outlined below describe how to do a network-based in-place upgrade. This will require an internet connection as well as a repository to connect to. I can’t stress this next point enough. Please. Please configure your system to use an alternate Ubuntu mirror other than the default. The default mirror(s) will be so overwhelmed with traffic that it’ll take forever to update your system. I might suggest using something like mirrors.kernel.org or another public mirror with a healthy pipe. You can also look for regional mirrors here. The list of regional mirrors also communicates how up to date the mirror is. You will, of course, need to select and up to date mirror.
To configure your system to use an alternate mirror you can follow the following steps:
- Open “Update Manager” (System > Administration > Update Manager)
- Click “Settings”
- On the “Ubuntu Software” tab there is a drop-down box labeled “Download From”
- Select “Other”
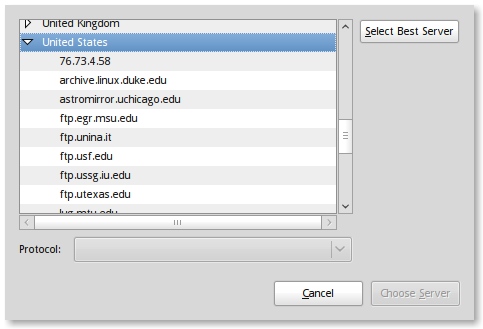
- Manually select a regional mirror OR click the button “Select Best Server”

Upgrading to Ubuntu 9.10
So you’ve applied all of the pending updates for Ubuntu 9.04 and now you’re ready to move on to Ubuntu 9.10. As above, this can be done via the command line or graphical interface. In this case, I might suggest the graphical interface.
Navigate to System > Administration > Update Manager and let it scan for available updates.

If you are reading this after the release of Ubuntu 9.10 (Oct 29th), this tool will automatically suggest that there is a new version available and offer to let you upgrade. This process will be automated for the most part, and quietly work in the background while you continue with your day. When it is finished it will suggest that you reboot your machine for the changes to take effect. When your machine comes back up you’ll be ready with Ubuntu 9.10.
Enjoy!
Question!
Please, what to do with the third party repositories that are for jaunty and that are currently installed on the ubuntu 9.04 system? changing the last letter from "jaunty" to "karmik" would do the job?
If the version of package "X" for "jaunty" is the same for "karmik" the aptitude upgrade will install the karmik version? or it will keep the the jaunty version until an actual new version is released?
Most of the jaunty packages will continue to work. I haven't had an issue, and I have a lot of third party repositories. But to answer your question, yes, you just change "jaunty" to "karmic" in the URLs. However, a lot of repositories don't yet have karmic specific packages, so they will give a 404 error for now, which isn't a problem. When they add karmic specific packages, it will just work automatically.
Oh, also, as of right now, I haven't found an official Ubuntu mirror that actually has the karmic packages
"If you are reading this after the release of Ubuntu 9.10 (Oct 29th), this tool will automatically suggest that there is a new version available and offer to let you upgrade."
OK, and if it doesn't, what then? 🙂
Oh, just found it: going to Update Manager from the menu won't show it, but running "update-manager -d" from a terminal will.
Well folks after reading thousands of post from sites worldwide the evidence says that over 80% of users who upgrade from 9.04 to 9.10 FAIL. The upgrade does NOT work. It refuses to run KDE on start and unless you are a linux guru, it is pretty much unfixable. Most poeple from the post I've read went back to 9.04. I would love to run new Kubuntu 9.10, unfortunely the built in automatic upgrade does NOT work. sigh.
Hardy (8.04 LTS) -> Koala (9.10) Was smooth w/o any visible issues.
Only 1 thing refuse to work:
<code>
Distribution: Ubuntu 9.10
Desktop environment: GNOME
Graphics chip: Intel Corporation Mobile GM965/GL960 Integrated Graphics Controller (rev 0c)
Driver in use: intel
Rendering method: None
</code>
please folks, im in desperate need of help over here!! trying to upgrade from Hardy -> Koala.
I open up ‘adept manager’, through gksudo when i press ‘alt + F2’
then i click on ‘fetch updates’, thereafter i click on ‘version upgrade’
it all seems to go fine, but at the last hurdle, after i clicked ‘finish’ – it leaves me with this message – Unable to get exclusive lock: This usually means that another package management application (like apt-get or aptitude) is already running. Please close that application first. – the only other application manager i have installed is ‘synaptic packet manager’,and it wont let me delete or cancel it. Any ideas how else to do an upgrade from Hardy -> Koala, or to bypass this error???