Archive

Posts Tagged ‘Encryption’

Install Firesheep on Ubuntu 10.04 or 10.10

November 26th, 2010 31 comments

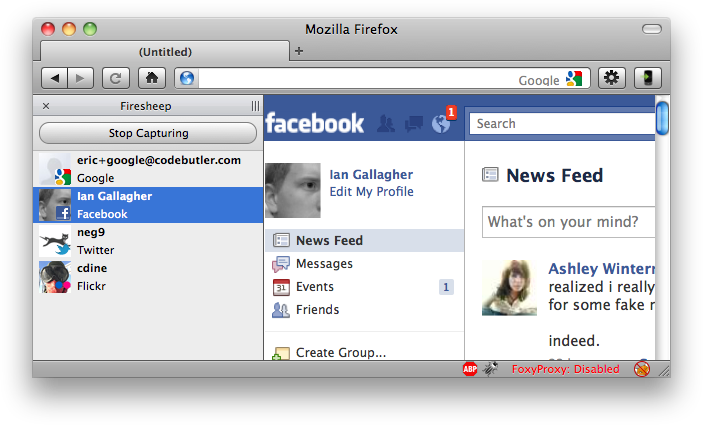
This morning I had a little bit of free time so I thought I’d (finally) check out the Firefox extension Firesheep. The main website mentions that it isn’t supported for Linux, but the source code is available and as it turns out very easy to compile. Below are instructions for downloading, compiling and installing the Firesheep security plugin for Firefox.

Get the Source

You’ll need to download the source code from github, which can be done using the following two commands:

git clone https://github.com/codebutler/firesheep.git
cd firesheep
git submodule update --init

These two commands will download the code required to compile Firesheep, putting the source into a new directory called “firesheep”.

Build Tools

To compile Firesheep on Ubuntu 10.04 or 10.10 you’ll need the following development packages installed. Simply copy-paste the following list of packages into your terminal:

sudo apt-get install autoconf libtool libpcap-dev libboost-all-dev libhal-dev xulrunner-1.9.2-dev

On my machine this installed quite a few packages, and while the main Firesheep website lists 10.10 specifically, I had no problems on my 10.04 installation.

Build Firesheep

You’re now ready to compile Firesheep. Run the following command and hopefully you’ll be able to build it without error:

./autogen.sh && make

Install the Plugin

If all is well you should find a new file called ‘firesheep.xpi’ in a subdirectory called build (ie; firesheep/build/). Simply drag-and-drop that file into your Addons dialog box, restart Firefox and you should be set.

I’ve been having some issues in actually capturing data on my Dell D630 with an Intel Pro/Wireless 3945ABG card. It looks like this tool is often hardware specific, so your mileage may vary. I’d be interested in anyone offering suggestions on getting it to capture properly on OS X 10.6 (macbook) or Ubuntu 10.04+.

Tunnel Web and DNS Traffic Over SSH

June 18th, 2008 7 comments

I have been tunneling all of my web traffic over an encrypted SSH connection for some time now. Considering the fact that I travel a lot, I’m very regularly on untrusted, insecure networks. I prefer to secure those connections (web, IM, email, etc) by creating an encrypted SSH connection and pushing the traffic through it. Today I also found a method for also pushing DNS requests through the same tunnel. This ensures total privacy between yourself and the SSH dedicated server.

Step 1: Creating the Tunnel

Creating this private connection you’ll need a remote SSH server to connect to. Mine runs at home in my garage on an old Pentium III 500MHz box (yeah, the kind most people threw away long, long ago!). I connect to this tunnel using:

ssh -D 8080 -fN user@server

This creates a SOCKS compatible proxy, which is a requirement of the DNS forwarding. Other methods on the interwebs suggest using ssh -L or similar, which are not SOCKS compatible proxies.

Step 2: Forwarding DNS

If you’d like to also forward your DNS requests (ie; the site addresses you type into your browser), you’ll need to change a setting in Firefox. This can be done by accessing the address about:config, and entering this string into the configuration:

network.proxy.socks_remote_dns

Change this value to “true”.

Step 3: Using the Tunnel

The last step is to configure your browser to use these new settings. In Firefox 3 (I hope you’ve upgraded by now), you can activate/toggle these settings via:

Edit > Preferences > Advanced > Network > Settings

Select “Manual Proxy Configuration” and add localhost to the “SOCKS Host:” field, followed by port 8080 (assuming you’ve used the port in the example above).

configure proxy in firefox

This will then forward your web traffic through the SSH tunnel and DNS requests will also be forwarded.

You may want to check out the FoxyProxy plugin for a simpler way of toggling this on & off.

To deactivate the tunneling and use the local DNS again simply revert Step 3 back to “Direct Connection to the Internet”.

Categories: Security Tags: , , , , ,

Use VNC? Encrypt It Via SSH

June 12th, 2008 9 comments

I covered VNC this afternoon in my Linux system administration course and the question came up on how to secure VNC. You may or may not be aware than VNC is not encrypted by default, which could be a security concern.

If you use VNC regularly to connect to other Linux machines you may want to consider adding a level of encryption with SSH. Here is a quick run-down on how that is done:

If you look at the man page for vncviewer (man vncviewer) you’ll notice there is a small section for -via. The -via option, as outlined in the man page will do:

Makes the connection go through SSH to a gateway host. The gateway should be the target host for best connection secrecy.

Basically this is saying that you can tunnel VNC over SSH within your connection command. Let’s give it a try.

vncviewer -via user@host localhost:0

This, of course, will require that you have both ssh and vnc access to a remote machine.

This is a much simpler method than many other tutorials I’ve found which generally suggest creating a tunnel with ssh -L and then using that tunnel.

Categories: Security Tags: , , ,

7 Steps To An Encrypted Partition (local or removable disk)

August 17th, 2007 25 comments

Update : Encypted root file system option now available at installation in Ubuntu 7.10.  See Install Time Ubuntu Encryption for more information.

This last week I’ve been very interested in encryption. If you missed it you might be interested in my post on encrypting files or emails with GPG. In this tutorial I wanted to outline how to encrypt a local partition or a removable device (like a USB key). The steps used here will work for either type of device although you’ll need to replace your partition name and number for the examples provided here.

Attention: following this tutorial will wipe all data from the partition or device you write it to. You cannot encrypt your file system after-the-fact using this method. Be sure you have backups or don’t care about the data being lost if you follow these steps!!!

Step 1:

The first step in the tutorial is installing the cryptsetup utility, which is part of the cryptsetup package. You can search for this using your favorite package management utility or use this command:

sudo aptitude install cryptsetup

Step 2:

Now that we have the cryptsetup utility installed we’ll need to prepare the device for use. If you have a newly created device or partition you may be able to skip this step, but it also won’t hurt to redo this step anyway.

If you are unsure what the device is listed as, you can use either of these two commands:

sudo fdisk -l

(this will list your current partition table, both on local and removable media.)

dmesg

(this will show kernel messages pertaining to hardware. If you plug in a removable device and wait a few seconds, this will show what you what device the kernel assigned the hardware.)

Once you know what device you want to apply this to you can run the following command on [your device] to create the partition you want to encrypt. I suppose you can also use a graphical utility like gparted, etc. Those tools are outside the scope of this tutorial.

sudo fdisk /dev/[your device]

(ie; if your device showed up as /dev/sdb you would use: sudo fdisk /dev/sdb)

For removable media make a single primary partition using the entire space of the device (or alter for your needs if you know what you’re doing).

Once you have created the partition you’ll want to “w”rite the change in fdisk. Remember, if you don’t “w”rite the changes none will be applied.

Step 3:

To make sure that your kernel is up to date concerning the newly created / altered partition table you may need to run the command:

sudo partprobe

Step 4:

Now we’ll get to encrypting this new partition. There are different options you can use here, and I’ll outline a few of them, but there really isn’t one that is “the best”. It depends on your level of security needs and the time you want to spend on it. If you want it done quickly and want a basic level of fairly-hard-to-break encryption you can use the first option. If you are super paranoid and don’t mind letting this take some time (hours or days on large disks!) to build you can use option three. Somewhere in the middle, option two is probably fine. Anyone have suggestions on other methods?

We’ll write data over the newly created partition to help aid in the encryption process. By writing data to the partition prior to encryption it helps protect against data attacks, finding patterns on the block-level, etc. You can use one of the following three commands:

sudo dd if=/dev/zero of=/dev/[your device] bs=4K

(this method is probably recommended unless you expect active attacks against your encryption layer)

sudo badblocks -vfw /dev/[your device] [block-size-of-your-device]

(this option will write 5 data patterns across your drive and overwrite and verify the data. This is used to check for badblocks, but can also be used to wipe out any existing data)

sudo dd if=/dev/urandom of=/dev/[your device] bs=4K

(this method is considered pretty secure. It is based on the truly random option below but is pseudo-random data--probably a very good option in most cases.)

sudo dd if=/dev/random of=/dev/[your device] bs=4K

(this is considered the most secure but will take a long time. It is also important to generate a lot of random data on your machine. Launch some applications, do some high disc I/O, move the mouse erratically, etc. This may take DAYS!)

Step 5:

At this point the partition is ready to be encrypted. Now there are multiple encryption methods and options to be used within each. This tutorial outlines using the LUKS encryption with my prefered string length, hash and cipher. You may change these if you know what you’re doing. If not, omitting my options will use the defaults (ripemd160 hash). This command will remind you that all data will be lost (although we already lost everything in Step 4. This is also where you’ll be prompted for your passphrase to access the encryption.

sudo cryptsetup luksFormat /dev/[your device] -c aes -s 256 -h sha256

(again, past [your device] are my preferred options)

If you see an error near this point similar to “Failed to setup dm-crypt key mapping. Check kernel for support for the aes-cbc-plain cipher spec and verify that /dev/[your device] contains at least 258 sectors.” you’ll need to run this command:

sudo modprobe dm-crypt

You may want to have this module auto-magically added at boot time by appending this line to your /etc/modules file:

dm-crypt

Step 6:

Now that we’ve created the encryption basic layout on the partition we need to open the encrypted partition for use.

sudo cryptsetup luksOpen /dev/[your device] name

(name can be whatever you like. I use things like secure or vault or encrypt)

Step 7:

Now that we have the device open and added to the dm (dev mapper) system we can actually create a file system on it and use it. One last command and we’ve got ourselves an encrypted, usable filesystem.

sudo mke2fs -j /dev/mapper/name -L label

(where name was applied above and label is the filesystem label. I generally match the two. This also assumes an ext3 file system. If you know you want a different filesystem type I'm assuming you know the right command.)

If you’ve come this far your device is ready to use. A few additional points that you may be interested in.

Additional

First, if this is a local partition and filesystem, such as a /data folder, you may want it to be mounted automagically at boot time. You can add the new partition to your /etc/fstab file to be mounted at boot. Be sure to specify the /dev/mapper/[name] location and not the original partition location. You should note that when your booting system arrives at this device it will prompt you for a passphrase key and halt the boot process until one is provided. An example of a line in the /etc/fstab is:

/dev/mapper/name /data ext3 defaults 0 0

Second, if you are using this on a removable drive such as a usb key the Gnome Desktop (someone verify in KDE?) will recognize the encrypted setup and prompt you for a key visually. A message such as “The storage device contains encrypted data. Enter a password to unlock” will appear. You will be required to know the passphrase (as supplied in Step 5) to access this device again. The desktop system also allows you to “forget immediately“, “remember password until you logout” or “remember forever” the key provided. Those options are up to you and your usage. “Remember forever” should store the key in your gnome keyring.

Third, if you are following this guide for use on a removable disk you may want to change ownership (chown) on the mounted path and set group id (sgid) on the directory so that your user has full permissions. Considering we ran everything with sudo the mounted path and ownership is probably set to the root user. You can use these two commands to set the permissions:

sudo chown -R user.user /media/[name]

(user.user should, of course, be replaced with your username on the system)

sudo chmod g+s /media/[name]

([name] is the mount point that the system auto-mounted the device on. It *should* match whatever you set the label to in step 7.)

There is also an option to create multiple keys to unlock the device. This is helpful if it is a multi-user system and you don’t want to use a shared passphrase. You would add a key to the encrypted device using:

sudo cryptsetup luksAddKey /dev/[your device]

This will prompt you for your current key and then the new key. The new key will have to be entered twice. Also, if you want to remove a key you can use the similar:

sudo cryptsetup luksDelKey /dev/[your device] [slot #]

To find out more information about your encrypted partition / device, and to see things such as assigned key slots, you can also use:

sudo cryptsetup status name

sudo cryptsetup luksDump /dev/[your device]

I would like to expand this soon to include encrypting your entire root filesystem or other variations like bypassing the passphrase but storing the “key” an a usb drive or similar. This way it is similar to a hardware key needed to boot your machine. There are a lot of different ways this could go… until then, I think this has become long enough :)

Categories: Security Tags: ,

Privacy and Encryption with PGP : Signing and Encrypting Email / Files

August 14th, 2007 12 comments

Preface

Saturday night the Ubuntu Utah Team had a great presentation on Privacy and Encryption. One very important topic and another very interesting topic. With as much is going on these days to screw with our privacy (NSA) it isn’t a bad idea to learn a little bit about encryption. Now, I know you may think that you aren’t doing anything private so what is the point? I’m not doing anything “private” either, but honestly if I really wanted to talk to the NSA I’d send my emails directly to them. I’m not doing things that *needs* to be hidden, it’s simply a matter of it not being any of their business.

I have for some time now been digitally signing my emails. If you’ve seen me pop-up on a mailing list or got any emails from me you’ve probably seen a digital signature in-line or as an attachment. Via this digital signature you can verify that the exact contents of the email into your box is the same contents that came out of mine. If even *one* character changed the signature would not validate and you could tell the email or signature had been tampered with.

I have also started signing and *encrypting* emails to others that also have a PGP key pair that I have personally trust-signed. We’ll get into the trust signing later but I wanted to share a few steps and some other references to how you can generate your own key and also be able to sign and / or encrypt emails or files.

The GUI Front-End

There are a number of tools to help you generate and manage your PGP keys. I suggest seahorse on gnome or kgpg on KDE. You can also use the command line equivalent on either system, which will be standard between the two. (note: there are also solutions for OS X and Windows, but I won’t get into those.)

First we’ll install the GUI front-end to go with the pre-installed GnuPG back-end.

sudo aptitude install seahorse (gnome)

or

sudo aptitude install gpa (gnome)

or

sudo aptitude install kgpg (kde)

Creating The Key

Now that we have one of these installed we’ll launch the front-end and start creating a key. In this example I’ll refer to seahorse but the steps should fairly easily transfer to the other two applications.

Applications > Accessories > Passwords and Encryption Keys

Select “Key” from the File Menu and “Create New Key (ctrl-N)

This will prompt you with a selection between PGP and SSH. In this case we’ll want PGP.

The next window will prompt you for your full name, email address and comment. It is generally recommended to use your full legal name (not nicknames or aliases) and your primary valid email address. I suggest leaving the comment section empty.

You may want to select the “Advanced key options” button and set a higher key strength. The default type DSA Elgamal of 2048 is a very powerful key strength but it does support up to 4096 as well. Personally I chose the 4096 but, again, the default 2048 is plenty powerful in itself.

You can also optionally select a date that this key will expire. Unless you know a reason why you’d want to do that (sometimes for temporary project-based keys, etc) you can safely set it to not-expire.

When you hit “Create” it will ask you for a passphrase to bind to this key pair. Choose a good, solid, more-than-a-dozen character passphrase to make this even more solid. Your digital signature and key are only as strong as its weakest link which is the passphrase. If someone gets a hold of your passphrase they can make use of your private key, un-encrypt emails sent to you or appear to be you! Once you have entered the passphrase it will generate your key pair. Remember this passphrase because, without it, the key pair is useless!

Depending on the key strength and the speed of your machine this may take a while. You should see a progress bar on the screen while it processes a new key. Just be patient.

You now have a basic key that is capable of digitally signing and optionally encrypting emails or files. One great use of this is to digitally sign the Ubuntu Code of Conduct as outlined here.

Using the Key

For those of you that want to get started right away signing emails you may be interested in some of the extensions available for commonly used mail applications. Thunderbird has a great one (actually the #1 reason I use Thunderbird as my client) with Enigmail. You can find it on the mozilla addons site or via the ubuntu repositories.

Evolution has PGP support built in but it is not as flexible (or at least I haven’t figured it out). You can find this in the Privacy tab of your email box settings.

Now this tutorial is getting a bit long so I’ll have to expand this next time and explain expanding your key with your alternate email addresses, keysigning parties, etc.

Until then I hope this helped a little bit.

UPDATE: screenshots of the key creation here [1,2,3,4]

Two major things to remember before you run off and start playing around. Remember your passphrase and back up your private key!!

Your public and private keys are found in ~/.gnupg/ . I suggest backing up this entire folder to an external USB. If you lose your private key the whole pair is useless. Even if you still have the public key and the passphrase the private key section is the most critical part of the process.

Categories: Big Brother Tags: , ,

VNC over SSH : securing the remote desktop

June 12th, 2007 13 comments

I was discussing VNC this afternoon with some students and the question came up on how to secure VNC.  As you may have noticed most network protocols do not have much for built in security.  Many rely on other programs for their network security needs, such as ssh.  This is also the case with VNC.

If you use VNC regularly to connect to other Linux machines you may want to consider adding a lower-layer of encryption with ssh.  Here is a quick run-down on how that is done:

If you look at the man page for vncviewer (man (1) vncviwer) you’ll notice there is a small section for -via.  The -via option, as outlined in the man page will do:

Makes the connection go through SSH to a gateway host.  The gateway should be the target host for best connection secrecy.

Basically this is saying that you can tunnel VNC over SSH within your connection command.  Let’s give it a try.

vncviewer -via user@host localhost:0

This, of course, will require that you have both ssh and vnc access to a remote machine.

Categories: Security Tags: , ,