Instant Ubuntu Now Available
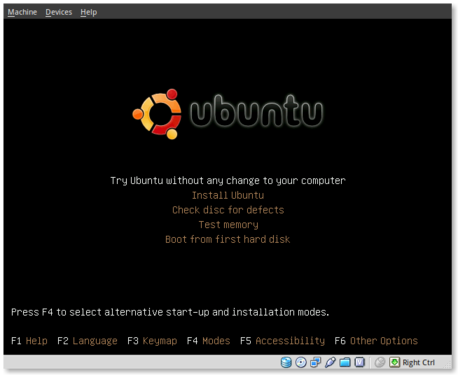
I’m very happy to announce the availability of my new book, “Instant Ubuntu“! I spent most of the summer working on this and I’m very happy to finally see it published. This book is written for those brand-new to Ubuntu. The book includes step-by-step installation instructions, a tour of the Unity desktop and an outline… Read More »