Find your Ubuntu kernel version
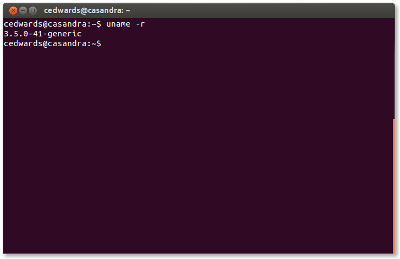
I’m often surprised at the obscure ways that people find my site through Google searches. Looking through my traffic statistics I find that one of the most popular methods used to find my blog is by searching for the term “ubuntu kernel version”. I would not have expected that to be a popular search term,… Read More »