Archive

Posts Tagged ‘beta’

Install Guest-Additions on Ubuntu 10.10 Beta : Workaround

September 8th, 2010 9 comments

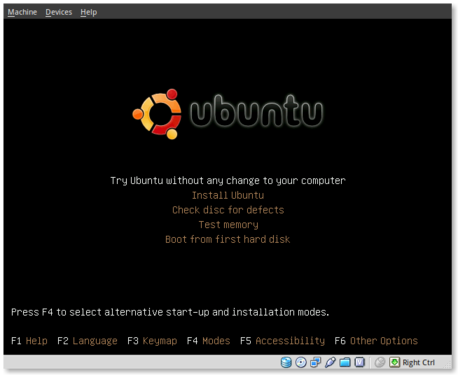
I took some time today to check out Ubuntu 10.10 Beta. So far I’m impressed with some of the improvements, and I’ll blog about those later, but in the meantime I thought I’d share a workaround I came across in getting Guest Additions working when running Ubuntu 10.10 inside VirtualBox.

My first attempt at getting Guest Additions installed was by mounting the CD and running the command:

sudo ./VBoxLinuxAdditions-x86.run

While this attempted to compile the drivers necessary for Guest Additions, it never seemed to work. After repeated reboots and rebuilds, I could never get a better resolution. After a little searching I came across a solution that seems to take care of the problem.

To install Guest Additions in Ubuntu 10.10 Beta, you’ll need to install a pre-packaged version available through the repositories. You can run the command below, or click on the URL:

sudo apt-get install virtualbox-ose-guest-x11

After a quick reboot you should be set.

I hope you enjoy Ubuntu 10.10 Beta (and forward). It’s the little things like this that make testing it in a virtual machine worthwhile.

Install Skype for Linux Beta v2.1.0.81 on Ubuntu 9.10

January 21st, 2010 3 comments

Skype just recently released an updated version of their desktop client for Linux, Skype Beta v2.1.0.81. This release fixes some major bugs and well as introduces some new features previously unavailable on the Linux release. I am very happy to see this version released as I use Skype quite regularly. Not only to talk to distant family, but also day-to-day as a standard home phone. Yes, that’s right. It is 2010 and I don’t even own a cell-phone! With high-speed internet so readily available between my home, office and public transportation, I simply use Skype as my contact phone number.

In this article I will outline how to install the latest Skype release directly from the Skype website. This version should fix the issues Ubuntu users previously had with Pulse Audio as well as issues presented by using dark themes in GNOME.

Requirements

If you currently have Skype installed, from the Medibuntu repository, you’ll want to remove that package. Until the Medibuntu team updates their release, the two packages might conflict.

You can uninstall the existing package using the command:

sudo aptitude remove skype

Installation

We’ll now grab the Skype for Linux Beta v2.1.0.81 package from the Skype website. The links below are direct-download links. Please select the appropriate architecture:

Once the package downloads you should be prompted to either “Save As…” or “Open With : GDebi Package Manager”. Select the latter which will launch a package management tool and install the package for you. If you are only prompted to “Save As”, you can simply double-click on the Skype download item in your Downloads window and the installer will launch.

If there are any needed dependencies these will be taken care of using this tool.

Applying GNOME Theme

This release now allows you to apply your GTK theme to the Skype desktop client. You can do this by launching Skype (Applications > Internet > Skype) and opening the “Options” menu. On the General tab you can now select “Choose Style” underneath the language selection option. This will allow your Skype client to better blend in with your GNOME Desktop.

New Features
This release of Skype includes a number of new features other than the bug fixes mentioned above. Some of these new features have been available on the OS X and Windows version, but are now also included in Linux. These include:

  • Screen Sharing
  • Report Abuse
  • Support for UI Styles
  • Message Quoting
  • Localized Time Formats

See the Skype Changelog for more detailed information.

Conclusion
Skype is a great tool for communicating with friends and family worldwide. It has become a required tool in my daily arsenal, and I think these new additions make it even better. If you haven’t used Skype in a while, I’d invite you to check out this release.

Categories: Linux Tags: ,

How To Install KDE 4.4 RC In Ubuntu 9.10 “Karmic Koala”

January 19th, 2010 4 comments

As I mentioned a few days back in my article regarding Installing Dropbox on Kubuntu, I’ve been tinkering with KDE recently and I am enjoying my time with it. I know I’ve written in the past regarding some frustrations with KDE, but I have to admit that many of my frustrations have gone away as the KDE 4.x series has matured. Again, if you haven’t tried KDE in a while I would invite you to do so.

In this article I will outline how to activate the kubuntu-ppa (Personal Package Archive), which will allow you to install the latest KDE packages. These instructions are specific to the KDE 4.4 RC (Release Candidate) packages, which are offered for feedback and testing. If you would like to try the latest that Kubuntu has to offer (even potentially unstable), you’ll want to continue reading.

Requirements

In order to download and install the latest KDE packages you’ll need to configure and activate the Kubuntu PPA. This is a Personal Package Archive, hosted on Launchpad, which is maintained by the Kubuntu Developers, and allows for staging and testing new packages. To activate the repository, run the command:

sudo add-apt-repository ppa:kubuntu-ppa/beta

The Kubuntu PPA, particularly the RC packages, should now be configured and activated on your machine. You’ll still need to refresh your repository and install the updates, which I will cover next.

Installing KDE RC Packages

There are two approaches we can take to installing these packages. The first is for people who are already running Kubuntu (KDE) and want to simply update their installed packages to those offered in the RC repository.

To upgrade your existing installation to KDE 4.x RC, run the following two commands:

sudo apt-get update
sudo apt-get dist-upgrade

The second method is for people interested in trying KDE 4.x RC who do not have KDE installed currently.

To install KDE 4.x RC packages, use the following:

sudo apt-get update
sudo apt-get dist-upgrade
sudo apt-get install kubuntu-desktop

I consider the KDE 4.x series to be very mature at this point, with a plethora of features and effects. I think the KDE Team has done a great job on improving the Linux Desktop over the past few years, and I continue to enjoy my time using it. I continue to use GNOME as well, but KDE 4.x has rebuilt the bridges that previous experiences had burned.

I am interested in hearing what you think about these RC packages, and how stable you find them to be. Do you enjoy being on the bleeding edge? If you run into problems, you might try looking for support in our Forum.

Categories: KDE Tags: ,

Installing Google Chrome BETA on Ubuntu 9.10

December 23rd, 2009 3 comments

I don’t think I’ve blogged much about it here, but I have become a huge fan of Google Chrome (or Chromium) on Linux. Anytime I’ve found the need to use Firefox of late it feels *dog* slow and clunky. Chrome is absolutely faster and I have really enjoyed using it.

You’ve probably heard by now that Google has released a Beta version for Linux as well as Mac, both of which are available on the download site. For the longest time I had been using the PPA or manual builds of Chromium, but now I’m using the Beta and life has become simpler.

Installing Chrome Beta

For those that haven’t tried Chrome yet, I’d invite you to give the Beta a shot. This version has support for user scripts (such as Adblock) as well as bookmark sync. To install the Beta version, visit http://google.com/chrome.

Click on the “Get Google Chrome (Beta)” in the upper-right.

Select the 32bit or 64bit .deb (For Debian/Ubuntu)

Click “Accept and Install”

This will download the .deb package, which you should be able to install without requiring any additional dependencies, using the GtkDebi installer (this should be the default “Open With…” application.

Keeping Updated

In doing some research the other day I found that installing the package above automagically installs the Google repository as well. This will ensure that your package stays updated as Google releases new version of the Beta, and eventually final browser. You don’t need to do anything else to remain updated, simply apply updates as you are prompted and this will also include the Google Chrome Beta browser!

Categories: Internet Tags: , , , ,

Ubuntu 9.10 “Karmic Koala” Beta Reviewed (Screenshots!)

October 2nd, 2009 15 comments

Yesterday I installed the Ubuntu 9.10 “Karmic Koala” Beta release by way of the desktop (Live-CD) based installer. The installation was very clean and polished. It has been a while since I’ve used a graphical installer and I am pleased with the improvements that I found. It definitely rivals any “professional” or “enterprise” install session that I’ve ever seen, and easily beats them in terms of speed and ease. I’d like to give a short review of the Beta release and encourage everyone to try it and finalize any remaining bugs.

Installation

The installation was quick and painless. All of the questions were asked in the beginning and then the installer took over. During the installation messages were displayed regarding the benefits of Ubuntu and the software that it provided. Below are some screenshots of the installation process.

ubuntu-beta-install-1

This is the initial installation screen. As you can see it offers a number of options including disk and memory checks, as well as booting off existing installations. I selected “Install Ubuntu” and hit [ENTER].

ubuntu-beta-install-2

This appears to be the initial boot splash screen while the Live-CD installer is booting.

ubuntu-beta-install-3

A preview of the new default wallpaper.

ubuntu-beta-install-4

Welcome to the installer! Select your preferred language. This language will be used during and after the installation.

ubuntu-beta-install-5

Select your timezone. I very much like this improved location selector tool. Instead of trying to find myself on a map that zooms in and out (you may remember what I’m referring to from previous releases), this simply slices up the world into timezones and allows you to select yours.

ubuntu-beta-install-6

Select your keyboard layout. For US English standard qwerty layouts you can click forward. I needed to select “Choose your own:” and “USA – Dvorak” for my layout.

ubuntu-beta-install-7

Partitioning was simple. I erased and used the entire disk.

ubuntu-beta-install-8

Username information. Enter your full name, username and password information. Remember that this user will also act as the initial administrator.

I also like the addition of the “Require my password to log in and to decrypt my home folder” as well as the other options. I selected the last option and am using the encrypted home folder system.

ubuntu-beta-install-9

Final review point before installation. From here you can still go back and make changes. Once you click install it should be hands free from here out.

ubuntu-beta-install-10

Welcome to Ubuntu 9.10 – “Ubuntu is designed to be easy. Feel free to explore!”

ubuntu-beta-install-11

Browse the web with Firefox

ubuntu-beta-install-12

Relive Memories with F-Spot Photo Manager

ubuntu-beta-install-13

Accessibility in Ubuntu

ubuntu-beta-install-14

Control your digital life with Evolution

ubuntu-beta-install-15

Keep in contact with Empathy IM

ubuntu-beta-install-16

Office tools at your fingertips

ubuntu-beta-install-17

Watch and listen on Ubuntu

ubuntu-beta-install-18

Installing additional software

ubuntu-beta-install-19

Getting Help with Ubuntu

ubuntu-beta-install-21

Post Installation

Installation complete. At this point you can restart the machine and your installation should be done.

after-installation

This is a screenshot of my final installation. I have changed the following:

Conclusion

So far I think this release seems very polished. The graphics and artwork are very clean and professional. I had no trouble getting things installed properly, and I haven’t had any issues post-installation. The notification system appears to be a little more polished as compared to 9.04. We’ll see what my feelings are with continued use.

So far I am pleased with this release and would confidently suggest it to others, even if it is the Beta release.

Bugs

I did submit two bugs since I installed. I’ve listed them below for feedback, verification and hopefully closure:

Upgrading From Beta To RC And Beyond…

April 21st, 2008 4 comments

I keep seeing this question pop up in IRC so I thought I’d post something about it…

“How do I upgrade from Ubuntu Beta to Ubuntu RC (and eventually to Final)?”

If you’ve installed Beta and want to upgrade to RC (and eventually Final) simply continue to update your machine.  There isn’t anything special that needs to be done, just run Update Manager and apply any available updates.  Updating your machine in this way will take you from Beta to RC to Final.

I hope that helps for anyone still wondering.  Also, for those of you that are still on Ubuntu 7.10 “Gutsy” that are going to be updating I’ll have instructions on that over the next two days.

Categories: Upgrade Tags: , , ,

Updating Ubuntu Images With Jigdo

April 18th, 2008 5 comments

Well its that time again, the Ubuntu community is just about ready to launch another fantastic release and with that release the worlds interweb tubes are going to get clogged as everyone upgrades.  It’s about this time that I always start thinking about ways to be more efficient with my bandwidth.

Bittorrent, of course, is a great improvement over the traditional direct download method but in some cases there are potentially more efficient methods to use.  I’d like to outline (as I do with every release) how to update your current ubuntu images using Jigdo.

Jigdo, if you’re not familiar, takes a current Ubuntu image and compares its contained packages with the packages within an updated image (ie; alpha vs beta, beta vs RC, RC vs final).  Using this method you’re only downloading the packages that have *changed* between images and not the entire image again.  The morning RC was released I used jigdo against my local ubuntu package mirror and had the new image in about a minute!

Installing Jigdo

Jigdo is available within the Ubuntu repositories.  To install Jigdo you can run the command:

sudo aptitude install jigdo-file

Using Jigdo

Jigdo requires a .jigdo file, which outlines what the latest image *should* have, which is then compared to the previous image file that you already have on the machine.  The previous image can be burned and in the drive or loop-mounted (mount -o loop file.iso /mnt).  So, to begin you’ll need to start Jigdo and give it the path to a .jigdo file:

jigdo-lite http://us.releases.ubuntu.com/hardy/ubuntu-8.04-rc-alternate-i386.jigdo

The .jigdo file can be found on most download sites, look for it just below the .iso or .torrent files.

Jigdo will then download that .jigdo file and read the contents of what package versions should be in the latest release.  It will then ask you for the image you want to compare it to, which you can point it to your loaded disk or mounted .iso.

If not much has changed between the images (its *really* efficient for updating dailies!) it should be finished pretty quickly.  The more changes there are the more packages it’ll have to download.  When it has being able to find, or has downloaded the required updated packages, it’ll create a new .iso image for you.  Tada!  You have an upgraded image and you’ve used much less bandwidth than traditional methods.

note: using Jigdo to compare a 7.10 image vs an 8.04 image is not going to offer any improvements–everything has been changed.  It is best used for incremental updates, like beta to RC, RC to final, etc.

For more information on using Jigdo for updating Ubuntu images see the JigdoDownloadHowTo Wiki page.

Categories: Upgrade Tags: , , , ,